
An HTML id name is quite similar to class attribute with some minor differences(We will be discussing the differences later in this tutorial).
As the name suggests an HTML id is used to define a single ID for an HTML element. An HTML id name begins with a hash (i.e. #) followed by the id name.
Let us understand it with the below example :
<html>
	<head>
		<style>
			#myID {
                border-style: dotted;
                border-width: 5px;
			}
		</style>
	</head>
	<body>
		<div id = "myID">
			<img src="image1.jpg" style = "width:100%">
        </div>
	</body>
</html>
So, in the above example we have followed a set of tasks to use the id attribute. Let us see them below :

<head>
	...
</head>
<head>
	<style>
		...
	</style>
</head>
<head>
	<style>
		#myID {
			border-style: dotted;
			border-width: 5px;
		}
	</style>
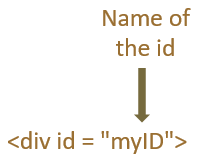
</head>In words, we give a to the id attribute(myID in this case).
<div id = "myID">
And define the values of the class inside the <style> attribute.
<style>
	#myID {
		border-style: dotted;
		border-width: 5px;
	}
</style>
The id is created using a hash (i.e. #) followed by the id name (i.e. #myID). Post which you can define the values inside the braces(i.e. {}).
#myID {
	border-style: dotted;
	border-width: 5px;
}
Next, let us see the difference between the id and class attribute.
An id attribute begins with a hash (i.e. #) followed by the id name.
#myID {
	border-style: dotted;
	border-width: 5px;
}
Whereas a class attribute begins with a dot (i.e. .) followed by the class name.
.myClass {
	border-style: dotted;
	border-width: 5px;
}
An id attribute can be used with only one HTML element.
<html>
<head>
	<style>
		#myID {
			border-style: dotted;
			border-width: 5px;
		}
	</style>
</head>
<body>
	<div id = "myID">
		<img src="image1.jpg">
	</div>

</html>
Whereas a class name can be used with multiple HTML elements.
<html>
<head>
<style>
	.myClass {
		width:40%;
		display:inline-block;
	}
</style>
</head>
<body>
	<div class = "myClass">
		<img src="image1.jpg">
	</div>
	<div class = "myClass">
		<img src="image2.jpg">
	</div>
</body>
</html>