
While surfing web pages, you might have seen various images. Ever wondered how they are placed in the web page?
Well! There is an <img> tag that helps the images to be placed in the web page.
Let us understand it with the below example.
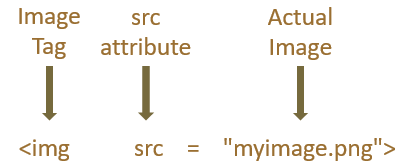
Say, you have an image and you want it to be placed in your web page. In such scenario we would be using the <img> tag along with the src attribute.
<html>
	<body>
        <img src = "myimage.png">
	</body>
</html>
So, in the above code, we have an image tag(i.e. <img >) with an attribute called src. And inside the src tag we put the name of the image we want to display.

The src attribute contains the name of the image.
Now, what if you want an image from a different website. And all you have to do is specify the website and the location of the image in the src attribute and the image will be available to you.
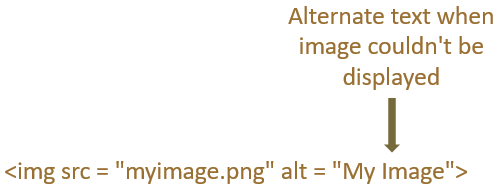
What if for some reason the image you want to display is not getting displayed on the screen(For any reason). In such case, you might want to display an alternate text on the screen.
And the alt attribute is used to display the alternate text on the screen.
<html>
	<body>
        <img src = "myimage.png" alt = "My Image">
	</body>
</html>
So in the above example, the image myimage.png couldn't be displayed on the screen and that is when the alternate text from the alt tag(i.e. My Image) is displayed on the screen.

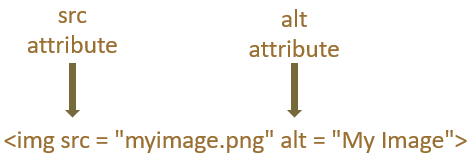
So, two things to remember about <img> tag :

Now just imagine, in some scenarios, you might want your image to be bigger in size or smaller in size. In other words, you want to specify a custom height and width for your image.
And thanks to HTML. As it provides two attributes called height and width, where you can specify the height and width of an image.
<html>
	<body>
        <img src = "myimage.png" alt = "My Image" height = "400" width = "700">
	</body>
</html>
So, in the above example, we have specified the value of height attribute as 400 and width attribute as 700. And the image is resized based on the height and width specified.
There is also an important attribute called style that lets you specify the height and width for an image.
<html>
	<body>
        <img src = "myimage.png" alt = "My Image" style="height:400px;width:700px;">
	</body>
</html>
So in the above example, we have specified the height and width and its values in pixels in the style attribute itself.

The images can be used inside an anchor(i.e. <a>) tag as well.
<html>
	<body>
        <a href="https://www.learnerslesson.com">
        	<img src = "myimage.png" style = "height:150px;width:130px">
        </a>
	</body>
</html>
So, in the above example, we have defined an image,
<img src = "myimage.png" style = "height:150px;width:130px">
And placed it inside the anchor tag,
<a href="https://www.learnerslesson.com">
	<img src = "myimage.png" style = "height:150px;width:130px">
</a>
Now, when you click on the image, it takes you to learnerslesson.com.